Guidance For 3D Printing Materials

Guidance For 3D Printing Materials

3D printing material Types, Applications, and  Attributes.

3D printing empowers you to prototype and manufacture parts for a wide range of applications quickly and cost-effectively. This comprehensive guide to 3D printing materials showcases the most popular plastic and metal 3D printing materials available, compares their properties, applications, and describes a framework that you can use to choose the right one for your project.

Plastic 3D Printing Materials and Processes

There are dozens of plastic materials available for 3D printing, each with its unique qualities that make it best suited to specific use cases. To simplify the process of finding the material best suited for a given part or product, let’s first look at the main types of plastics and the different 3D printing processes.

See below two main types of plastics:
  • Thermoplastics are the most commonly used type of plastic. The main feature that sets them apart from thermosets is their ability to go through numerous melt and solidification cycles. Thermoplastics can be heated and formed into the desired shape. The process is reversible, as no chemical bonding takes place, which makes recycling or melting and reusing thermoplastics feasible. A common analogy for thermoplastics is butter, which can be melted, re-solidify, and melted again. With each melting cycle, the properties change slightly.
  • Thermosetting plastics (also referred to as thermosets) remain in a permanent solid state after curing. Polymers in thermosetting materials cross-link during a curing process that is induced by heat, light, or suitable radiation. Thermosetting plastics decompose when heated rather than melting, and will not reform upon cooling. Recycling thermosets or returning the material back into its base ingredients is not possible. A thermosetting material is like cake batter, once baked into a cake, it cannot be melted back into batter again.
The three most established plastic 3D printing processes today are the following:
  • Fused deposition modeling (FDM) 3D printers melt and extrude thermoplastic filaments, which a printer nozzle deposits layer by layer in the build area.
  • Stereolithography (SLA) 3D printers use a laser to cure thermosetting liquid resins into hardened plastic in a process called photopolymerization.
  • Selective laser sintering (SLS) 3D printers use a high-powered laser to fuse small particles of thermoplastic powder.
FDM 3D Printing

Fused deposition modeling (FDM), also known as fused filament fabrication (FFF), is the most widely used form of 3D printing at the consumer level, fueled by the emergence of hobbyist 3D printers. 

This technique is well-suited for basic proof-of-concept models, as well as quick and low-cost prototyping of simple parts, such as parts that might typically be machined.

Consumer level FDM has the lowest resolution and accuracy when compared to other plastic 3D printing processes and is not the best option for printing complex designs or parts with intricate features. Higher-quality finishes may be obtained through chemical and mechanical polishing processes. Industrial FDM 3D printers use soluble supports to mitigate some of these issues and offer a wider range of engineering thermoplastics or even composites, but they also come at a steep price.

As the melted filament forms each layer, sometimes voids can remain between layers when they don’t adhere fully. This results in anisotropic parts, which is important to consider when you are designing parts meant to bear load or resist pulling.

FDM 3D printing materials are available in a variety of color options. Various experimental plastic filament blends also exist to create parts with wood- or metal-like surfaces.
Popular FDM 3D Printing Materials

The most common FDM 3D printing materials are ABS, PLA, and their various blends. More advanced FDM printers can also print with other specialized materials that offer properties like higher heat resistance, impact resistance, chemical resistance, and rigidity.

MATERIALFEATURESAPPLICATIONS
ABS (acrylonitrile butadiene styrene)Tough and durable
Heat and impact resistant
Requires a heated bed to print
Requires ventilation
Functional prototypes
PLA (polylactic acid)The easiest FDM materials to print
Rigid, strong, but brittle
Less resistant to heat and chemicals
Biodegradable
Odorless
Concept models
Looks-like prototypes
PETG (polyethylene terephthalate glycol)Compatible with lower printing temperatures for faster production
Humidity and chemical resistant
High transparency
Can be food safe
Waterproof applications
Snap-fit components
NylonStrong, durable, and lightweight
Tough and partially flexible
Heat and impact resistant
Very complex to print on FDM
Functional prototypes
Wear resistant parts
TPU (thermoplastic polyurethane)Flexible and stretchable
Impact resistant
Excellent vibration dampening
Flexible prototypes
PVA (polyvinyl alcohol)Soluble support material
Dissolves in water
Support material
HIPS (high impact polystyrene)Soluble support material most commonly used with ABS
Dissolves in chemical limonene
Support material
Composites (carbon fiber, kevlar, fiberglass)Rigid, strong, or extremely tough
Compatibility limited to some expensive industrial FDM 3D printers
Functional prototypes
Jigs, fixtures, and tooling
SLA 3D Printing

Stereolithography was the world’s first 3D printing technology, invented in the 1980s, and is still one of the most popular technologies for professionals. 

SLA parts have the highest resolution and accuracy, the clearest details, and the smoothest surface finish of all plastic 3D printing technologies. Resin 3D printing is a great option for highly detailed prototypes requiring tight tolerances and smooth surfaces, such as molds, patterns, and functional parts. SLA parts can also be highly polished and/or painted after printing, resulting in client-ready parts with high-detailed finishes.

Parts printed using SLA 3D printing are generally isotropic—their strength is more or less consistent regardless of orientation because chemical bonds happen between each layer. This results in parts with predictable mechanical performance critical for applications like jigs and fixtures, end-use parts, and functional prototyping.

SLA offers the widest range of material options for plastic 3D printing.
Popular SLA 3D Printing Materials

SLA 3D printing is highly versatile, offering resin formulations with a wide range of optical, mechanical, and thermal properties to match those of standard, engineering, and industrial thermoplastics.

FORMLABS MATERIALSFEATURESAPPLICATIONS
Standard ResinsHigh resolution
Smooth, matte surface finish
Concept models
Looks-like prototypes
Clear ResinThe only truly clear material for plastic 3D printing
Polishes to near optical transparency
Parts requiring optical transparency
Millifluidics
Draft ResinOne of the fastest materials for 3D printing
4x faster than standard resins, up to 10x faster than FDM
Initial Prototypes
Rapid Iterations
Tough and Durable ResinsStrong, robust, functional, and dynamic materials
Can handle compression, stretching, bending, and impacts without breaking
Various materials with properties similar to ABS or PE
Housings and enclosures
Jigs and fixtures
Connectors
Wear-and-tear prototypes
Rigid ResinsHighly filled, strong and stiff materials that resist bending
Thermally and chemically resistant
Dimensionally stable under load
Jigs, fixtures, and tooling
Turbines and fan blades
Fluid and airflow components
Electrical casings and automotive housings
Polyurethane ResinsExcellent long-term durability
UV, temperature, and humidity stable
Flame retardancy, sterilizability, and chemical and abrasion resistance
High performance automotive, aerospace, and machinery components
Robust and rugged end-use parts
Tough, longer-lasting functional prototypes
High Temp ResinHigh temperature resistance
High precision
Hot air, gas, and fluid flow
Heat resistant mounts, housings, and fixtures
Molds and inserts
Flexible and Elastic ResinsFlexibility of rubber, TPU, or silicone
Can withstand bending, flexing, and compression
Holds up to repeated cycles without tearing
Consumer goods prototyping
Compliant features for robotics
Medical devices and anatomical models
Special effects props and models
Medical and dental resinsA wide range of biocompatible resins for producing medical and dental appliancesDental and medical appliances, including surgical guides, dentures, and prosthetics
Jewelry resinsMaterials for investment casting and vulcanized rubber molding
Easy to cast, with intricate details and strong shape retention
Try-on pieces
Masters for reusable molds
Custom jewelry
ESD ResinESD-safe material to improve electronics manufacturing workflowsTooling & fixturing for electronics manufacturing
Anti-static prototypes and end-use components
Custom trays for component handling and storage
Flame Retardant (FR) ResinFlame retardant, heat-resistant, stiff, and creep-resistant material for indoor and industrial environments with high temperatures or ignition sourcesInterior parts in airplanes, automobiles, and railways
Custom jigs, fixtures, and replacement parts for industrial environments
Protective and internal consumer or medical electronics components
Ceramic ResinStone-like finish
Can be fired to create a fully ceramic piece
Engineering research
Art and design pieces
SLS 3D Printing

Selective laser sintering (SLS) 3D printing is trusted by engineers and manufacturers across different industries for its ability to produce strong, functional parts. Low cost per part, high productivity, and established materials make the technology ideal for a range of applications from rapid prototyping to small-batch, bridge, or custom manufacturing.

As the unfused powder supports the part during printing, there’s no need for dedicated support structures. This makes SLS ideal for complex geometries, including interior features, undercuts, thin walls, and negative features. 

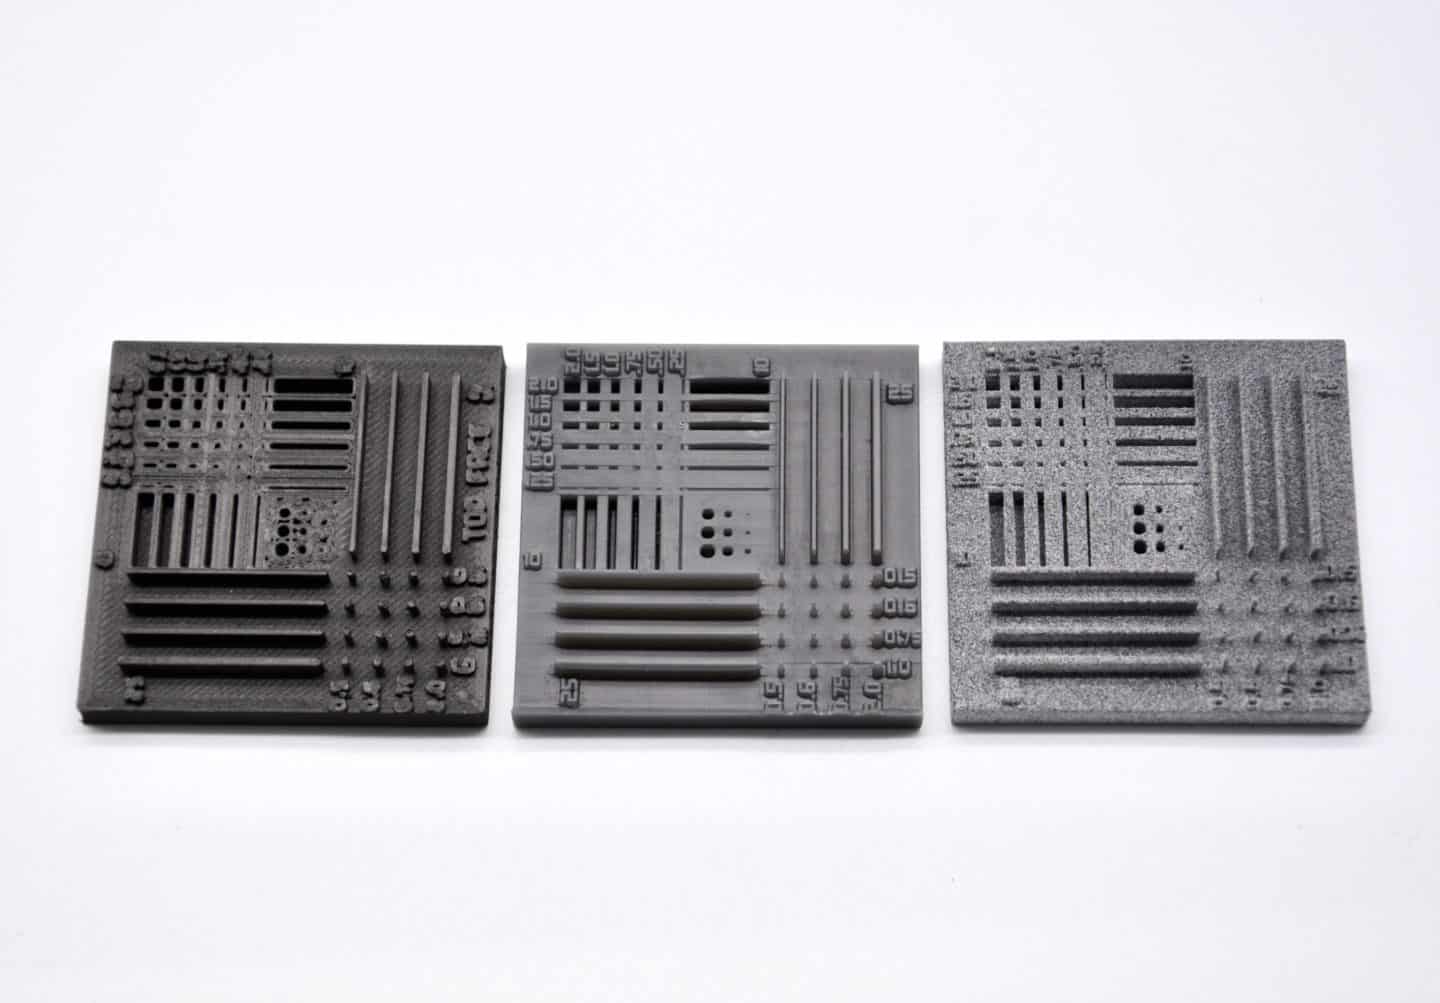
Just like SLA, SLS parts are also generally more isotropic than FDM parts. SLS parts have a slightly rough surface finish due to the powder particles, but almost no visible layer lines.

SLS 3D printing materials are ideal for a range of functional applications, from engineering consumer products to manufacturing and healthcare.
Popular SLS 3D Printing Materials

The material selection for SLS is limited compared to FDM and SLA, but the available materials have excellent mechanical characteristics, with strength resembling injection-molded parts. The most common material for selective laser sintering is nylon, a popular engineering thermoplastic with excellent mechanical properties. Nylon is lightweight, strong, and flexible, as well as stable against impact, chemicals, heat, UV light, water, and dirt.

MATERIALDESCRIPTIONAPPLICATIONS
Nylon 12Strong, stiff, sturdy, and durable
Impact-resistant and can endure repeated wear and tear
Resistant to UV, light, heat, moisture, solvents, temperature, and water
Functional prototyping
End-use parts
Medical devices
Nylon 11Similar properties to Nylon 12, but with a higher elasticity, elongation at break, and impact resistance, but lower stiffnessFunctional prototyping
End-use parts
Medical devices
TPUFlexible, elastic, and rubbery
Resilient to deformation
High UV stability
Great shock absorption
Functional prototyping
Flexible, rubber-like end-use parts
Medical devices
Nylon compositesNylon materials reinforced with glass, aluminum, or carbon fiber for added strength and rigidityFunctional prototyping
Structural end-use parts
Metal 3D Printing

Beyond plastics, there are multiple 3D printing processes available for metal 3D printing. 

  • Metal FDM

Metal FDM printers work similarly to traditional FDM printers, but use extrude metal rods held together by polymer binders. The finished “green” parts are then sintered in a furnace to remove the binder. 

  • Selective Laser Melting (SLM) and Direct Metal Laser Sintering (DMLS) 

SLM and DMLS printers work similarly to SLS printers, but instead of fusing polymer powders, they fuse metal powder particles together layer by layer using a laser. SLM and DMLS 3D printers can create strong, accurate, and complex metal products, making this process ideal for aerospace, automotive, and medical applications.

Popular Metal 3D Printing Materials
  • Titanium is lightweight and has excellent mechanical characteristics. It is strong, hard and highly resistant to heat, oxidation, and acid.
  • Stainless steel has high strength, high ductility, and is resistant to corrosion.
  • Aluminum is a lightweight, durable, strong, and has good thermal properties.
  • Tool steel is a hard, scratch-resistant material that you can use to print end-use tools and other high-strength parts..
  • Nickel alloys have high tensile, creep and rupture strength and are heat and corrosion resistant.
Alternatives to Metal 3D Printing

Compared to plastic 3D printing technologies, metal 3D printing is substantially more costly and complex, limiting its accessibility to most businesses.

Alternatively, SLA 3D printing is well-suited for casting workflows that produce metal parts at a lower cost, with greater design freedom, and in less time than traditional methods. 

Another alternative is electroplating SLA parts, which involves coating a plastic material in a layer of metal via electrolysis. This combines some of the best qualities of metal—strength, electrical conductivity, and resistance to corrosion and abrasion—with the specific properties of the primary (usually plastic) material.

Plastic 3D printing is well-suited to create patterns that can be cast to produce metal parts.
Framework for Choosing the Right 3D Printing Material

With all these materials and 3D printing options available, how can you make the right selection?

Here’s our three-step framework to choose the right 3D printing material for your application.

Step 1: Define Performance Requirements

Plastics used for 3D printing have different chemical, optical, mechanical, and thermal characteristics that determine how the 3D printed parts will perform. As the intended use approaches real-world usage, performance requirements increase accordingly.

REQUIREMENTDESCRIPTIONRECOMMENDATION
Low performanceFor form and fit prototyping, conceptual modeling, and research and development, printed parts only need to meet low technical performance requirements.

Example: A form prototype of a soup ladle for ergonomic testing. No functional performance requirements needed besides surface finish.
FDM: PLA
SLA: Standard Resins, Clear Resin (transparent part), Draft Resin (fast printing)
Moderate performanceFor validation or pre-production uses, printed parts must behave as closely to final production parts as possible for functional testing but do not have strict lifetime requirements.

Example: A housing for electronic components to protect against sudden impact. Performance requirements include ability to absorb impact, housing needs to snap together and hold its shape.
FDM: ABS
SLA: Engineering Resins
SLS: Nylon 11, Nylon 12, TPU
High performanceFor end-use parts, final 3D printed production parts must stand up to significant wear for a specific time period, whether that’s one day, one week, or several years.

Example: Shoe outsoles. Performance requirements include strict lifetime testing with cyclic loading and unloading, color fastness over periods of years, amongst others like tear resistance.
FDM: Composites
SLA: Engineering, Medical, Dental, or Jewelry Resins
SLS: Nylon 11, Nylon 12, TPU, nylon composites
Step 2: Transform Performance Requirements to Material Requirements

Once you’ve identified the performance requirements for your product, the next step is translating them into material requirements—the properties of a material that will satisfy those performance needs. You’ll typically find these metrics on a material’s data sheet.

REQUIREMENTDESCRIPTIONRECOMMENDATION
Tensile strengthResistance of a material to breaking under tension. High tensile strength is important for structural, load bearing, mechanical, or statical parts.FDM: PLA
SLA: Clear Resin, Rigid Resins
SLS: Nylon 12, nylon composites
Flexural modulusResistance of a material to bending under load. Good indicator for either the stiffness (high modulus) or the flexibility (low modulus) of a material.FDM: PLA (high), ABS (medium)
SLA: Rigid Resins (high), Tough and Durable Resins (medium), Flexible and Elastic Resins (low)
SLS: nylon composites (high), Nylon 12 (medium)
ElongationResistance of a material to breaking when stretched. Helps you compare flexible materials based on how much they can stretch. Also indicates if a material will deform first, or break suddenly.FDM: ABS (medium), TPU (high)
SLA: Tough and Durable Resins (medium), Polyurethane Resins (medium), Flexible and Elastic Resins (high)
SLS: Nylon 12 (medium), Nylon 11 (medium), TPU (high)
Impact strengthAbility of a material to absorb shock and impact energy without breaking. Indicates toughness and durability, helps you figure out how easily a material will break when dropped on the ground or crashed into another object.FDM: ABS, Nylon
SLA: Tough 2000 Resin, Tough 1500 Resin, Grey Pro Resin, Durable Resin, Polyurethane Resins
SLS: Nylon 12, Nylon 11, nylon composites
Heat deflection temperatureTemperature at which a sample deforms under a specified load. Indicates if a material is suitable for high temperature applications.SLA: High Temp Resin, Rigid Resins
SLS: Nylon 12, Nylon 11, nylon composites
Hardness (durometer)Resistance of a material to surface deformation. Helps you identify the right “softness” for soft plastics, like rubber and elastomers for certain applications.FDM: TPU
SLA: Flexible Resin, Elastic Resin
SLS: TPU
Tear strengthResistance of a material to growth of cuts under tension. Important to assess the durability and the resistance to tearing of soft plastics and flexible materials, such as rubber.FDM: TPU
SLA: Flexible Resin, Elastic Resin, Durable Resin
SLS: Nylon 11, TPU
CreepCreep is the tendency of a material to deform permanently under the influence of constant stress: tensile, compressive, shear, or flexural. Low creep indicates longevity for hard plastics and is crucial for structural parts.FDM: ABS
SLA: Polyurethane Resins, Rigid Resins
SLS: Nylon 12, Nylon 11, nylon composites
Compression setPermanent deformation after material has been compressed. Important for soft plastics and elastic applications, tells you if a material will return to its original shape after the load is removed.FDM: TPU
SLA: Flexible Resin, Elastic Resin
SLS: TPU
Step 3: Make a Selection

Once you translate performance requirements to material requirements, you’ll most likely end up with a single material or a smaller group of materials that could be suitable for your application. 

If there are multiple materials that fulfil your basic requirements, you can then look at a wider range of desired characteristics and consider the pros, cons, and trade-offs of the given materials and processes to make the final choice.

Compare Plastic 3D Printing Materials and Processes

Different 3D printing materials and processes have their own strengths and weaknesses that define their suitability for different applications. The following table provides a high level summary of some key characteristics and considerations.

FDMSLASLS
ProsLow-cost consumer machines and materials availableGreat value
High accuracy
Smooth surface finish
Range of functional materials
Strong functional parts
Design freedom
No need for support structures
ConsLow accuracy
Low details
Limited design compatibility
High cost industrial machines if accuracy and high performance materials are needed
Sensitive to long exposure to UV lightMore expensive hardware
Limited material options
ApplicationsLow-cost rapid prototyping
Basic proof-of-concept models
Select end-use parts with high-end industrial machines and materials
Functional prototyping
Patterns, molds, and tooling
Dental applications
Jewelry prototyping and casting
Models and props
Functional prototyping
Short-run, bridge, or custom manufacturing
MaterialsStandard thermoplastics, such as ABS, PLA, and their various blends on consumer level machines. High performance composites on high cost industrial machinesVarieties of resin (thermosetting plastics). Standard, engineering (ABS-like, PP-like, flexible, heat-resistant), castable, dental, and medical (biocompatible).Engineering thermoplastics. Nylon 11, Nylon 12, and their composites, thermoplastic elastomers such as TPU.

Find more technical issues about CNC Machining3D PrintingSheet MetalVacuum CastingAluminum ExtrusionRapid Injection Molding.

Please feel free to reach out with us at eco@eco-rp.com and +86 137 1261 1558

How to Get a Smooth Surface With 3D Printing

How to Get a Smooth Surface With 3D Printing

In this article, we will explore the factors that affect the smoothness of 3D printed parts and how you can achieve high levels of smoothness.

Parts with a smooth surface finish are often required in 3D printing. This characteristic may be a functional requirement for the end-use of a part or an aesthetic requirement. Applications in which smoothness may be a functional requirement include mating parts, moving parts, stress/load-bearing surfaces, etc. 

Although 3D printing is usually a layer-by-layer process, additive manufacturing technologies are capable of printing relatively smooth surfaces. However, the smoothness of finished 3D printed parts depends on the printing process, the material, the post-processing operations and other secondary factors that will be related in this article.

3D printing technologies with a smooth surface finish

Because of the layer by layer printing involved in FDM printing and the diameter of the nozzle, FDM doesn’t always produce a very smooth surface finish. However, modern industrial FDM machines are capable of much finer surfaces. SLS, MJF, and DMLS produce a grainy surface as a result of the powdery nature of the raw materials used in these technologies. Regardless of 3D printing technology, a smooth surface can always be achieved in printed parts, using post-processing operations.

There are several 3D printing technologies capable of producing smooth as-printed parts. Those are explored below.

SLA 3D printing

Stereolithography 3D printing produces parts with the highest accuracy and smoothest surface finish among all 3D printing technologies. Although it is a layer-by-layer process, the raw material is usually in resin form and solidifies to give a smooth surface.

Polyjet 3D printing

Like SLA, Polyjet prints photopolymers. Most Polyjet parts are ready to use as-printed in terms of look and feel. The main reason for this smoothness is the combination of ultra-thin layer printing and high-quality resin.

Carbon DLS

Carbon DLS uses resin materials like polyurethane. The surface finish of the 3D part produced with this method is as smooth as glass. This process produces impeccable parts that can replace prototypes from MJF or SLS. In addition to a high-quality surface finish, Carbon DLS produces external and internal details perfectly.

FDM SLA MJF surface finish comparison
Comparison of 3D printed parts: FDM (left), SLA (center) and MJF (right)

3D printing materials with a smooth surface

Material consideration for smoothness typically goes together with printing process consideration, as, in most cases, the process is a far more significant factor. Thermoplastics, thermosetting resins, photopolymers, and polyurethane are typically 3D printing materials with a smooth surface finish.

But it is important to note that smoothness is rarely the only criteria for selecting materials. Other considerations like strength, heat resistance and accuracy are also considered.

Improving smoothness with post-processing

Post-processing is the most effective way of guaranteeing a smooth surface finish in 3D printing. In most cases, post-processing can be used to achieve smoothness in a part, irrespective of the material or the technology with which it was printed.

There are various post-processing methods that are not all suitable for all parts. Part geometry and material are the two biggest factors that influence post-processing techniques. Note that the different methods will deliver different textures and appearances.

Bead Blasting

The bead blasting technique involves spraying a pressurized stream of tiny beads of media (plastic or glass) from a nozzle onto the surface of the part. This removes the layer lines leaving a smooth finish. In addition, the end product resembles a uniform matte finish. Bead blasting is done in a closed chamber. Plastic bead blasting is more common for 3D printed parts. The finishing technique works with most FDM-printed parts and materials.

The plastic media is usually made up of finely reground thermoplastic particles; the abrasiveness can vary from harsh to mild. Another popular material used in bead blasting is baking soda.

One of the advantages of bead blasting over sanding is speed. The process takes about 5 to 10 min for a part. However, the duration will depend on the part size. Another advantage of bead blasting is the preservation of the part’s dimensions.

Vapour Smoothing

The industrial vapour smoothing device operates through a multistage process. It lowers the pressure within the sealed chambers containing the 3D printed parts. Then, a heated tray at the bottom receives the pumped solvent, turning it into vapour.

An air-circulation system pulls the resulting vapour and circulates it around the surface of the part, causing condensation on the surface. This melts away the surface of the printed part, leaving a smooth surface. The precise control of the airflow and temperature allows for desired results without over smoothing.

This process takes about three hours to completely smoothen the printed part regardless of the quantity or size. Also, safety is paramount as the chamber must be locked during operation to create a vacuum. The condensed and unused solvent drops to the bottom of the tank for reuse.

Vapour smoothing can cater for parts made with ASA, ABS, and other high-impact polystyrenes. However, polycarbonate and other polymers that melt under the solvent can get smoothened. Acetone is an example of a solvent that works in vapour smoothing.

Vapour smoothing is commonly applied in consumer products. The process does not significantly impact the dimensional accuracy of the 3D-printed part. Furthermore, the parts could be made ready for coating or filming with bead blasting.

A disadvantage of vapour smoothing is its lack of versatility. The process cannot accommodate more materials like sanding or bead blasting.

Tumble Finishing

The tumble finishing technique, also known as tumbling or rumbling, is usually used on relatively small parts. Some of the most common, large tumblers are capable of finishing parts of 400 x 120 x 120 mm or 200 x 200 x 200 mm. It is very effective for parts that contain a high percentage of metal powder.

In just an hour of polishing, the smoothness of metallic prints can be exponentially increased. The tumbling process uses a horizontal barrel filled with parts, media, water, or any other materials. A vibrator rotates the barrel, causing the media (stones) to continuously brush the parts and progressively smoothen them.

Sanding and polishing

Sanding is the process of progressively removing a very thin layer of material to expose a smoother one underneath. A rough surface simply means that some points on the surface are more elevated than others. Sanding is the process of evening out the surface using relatively rough materials such as sanders or grinders.

It can be carried out by hand or with the use of belt sanders and is done progressively. Sanding is most often paired with polishing.

One of the shortcomings of sanding is the difficulty in smoothening small, intricate geometries. Also, sanding may also affect a part’s dimensions. When very tight tolerances are required from the 3D parts, sanding may not be the best option. Consideration must be made during part design concerning the amount of material that will be removed by sanding.

Comparison of post-processing options for a smooth surface finish in 3D printing

Post-processingSuitable 3D printing technologyAdvantagesConsiderations
Bead BlastingSLS, MJF• Preservation of the part’s dimensions• Requires the use of extra materials
Vapour SmoothingMJF, SLS• Shiny surface• Lack of versatility
Tumble FinishingDMLS, SLS, MJF• Good for small parts• Size limitations for large parts exist
• Time-consuming
Sanding and polishingFDM, DMLS• Good for bumpy rough surfaces
• Polishing can produce a shiny surface
• Affects the part’s dimension
• Not suited for parts with high tolerances
• Not suited for parts with intricate geometries

Factors affecting part smooth surface during printing

The following are some of the factors that influence the smoothness of a 3D printed part during printing.

Extrusion Rate

This factor applies to only printing technologies that print via extrusion, such as FDM. Over extrusion could occur if the printer extrudes excess material than is needed. The resulting print will have each layer projecting from the surface as irregular forms. A simple remedy to this is to adjust the extrusion rate. The same goes for under extrusion.

Material Overheat

When printing with FDM technology, the heating temperature and the cooling rate play vital roles in the surface quality of printed parts. It is important to achieve the appropriate balance between them. Remember the printed plastic can form different shapes before it cools. Always set the printer to the appropriate temperature for the material being printed.

Ghosting/ Rippling

The defect caused by this appears as waves on the surface of the printed part. It occurs when the printer is moving at a faster pace than it can handle the vibrations from the moving parts. This defect is most common in FDM printing where the machine vibrates as the nozzle deposits material.

To avoid this, keep your moving motors well lubricated and balance any shaky parts.

Conclusion

Achieving smoothness in 3D printed parts depends on various factors. These include printing technology, materials, and printing techniques. In most cases, the desired surface smoothness can be achieved using post-processing operations.

Eco Rapid offers fast, reliable, and highly accurate 3D printing services with these technologies and materials. Through our Instant Quoting and our professional experienced expert team, we ensure that you experience a seamless part production process, from quoting to doorstep delivery.

Titanium alloy materials and products technology

Titanium alloy materials and products processing technology

Due to the high manufacturing cost for titanium alloy materials and products, in order to reduce the cost. The competitiveness of titanium alloy in the whole metal material market with a lower price.

Titanium is widely considered to offer unrivalled performance compared with other materials. But its price is often prohibitive to consumers, especially automakers.

The appearance of high quality and low cost. Will certainly contribute to the popularization and application of titanium and titanium alloy.

From the application status at home and abroad and the development of titanium processing technology. The plastic processing technology of titanium and titanium alloy will develop in the following directions in the future.

1) High performance, namely the development of alloys with higher service temperature.Higher specific strength. Higher specific modulus. Better corrosion resistance and wear resistance.
2) Multi-functional, that is the development of titanium alloys with various special functions and uses. Such as high damping. Low expansion. Constant resistance. High resistance. Anti-electrolysis passivation and hydrogen storage. Shape memory. Superconductivity. Low modulus biomedical titanium alloys, and further expand the application of titanium and titanium alloys.
3) Deepen the research or traditional alloy, improve the practical properties of existing alloys. And expand the application range of traditional alloys through the improvement of equipment and process.
4) Using advanced processing technology, large continuous processing equipment. Developing continuous processing technology, direct rolling technology. Cold forming technology and near net forming technology. improve the production efficiency, yield and product performance of titanium alloy.
5) Reduce costs, develop alloys with no or little precious metal elements. And add cheap elements such as iron. Oxygen and nitrogen. Develop titanium alloys that are easy to process and shape, easy to cut, alloy elements and parent alloys are cheap. To develop titanium alloy and improve the recovery and utilization rate of banned titanium by using banned materials. This is particularly important to reduce the cost of civil titanium alloy.
6) Using advanced computer technology to simulate the deformation and processing process of the workpiece. To predict the evolution of metal microstructure, and even to predict the mechanical properties of the product (Yield strength. Tensile strength. Elongation and hardness, etc). And design or improve tooling and analyze and process test results to reduce text volume. Improve work efficiency and reduce development cost.

Find more technical issues about CNC Machining3D PrintingSheet MetalVacuum CastingAluminum ExtrusionRapid Injection Molding.

Please feel free to reach out with us at eco@eco-rp.com and +86 137 1261 1558

Tolerances In CNC Machining

Tolerances in CNC Machining

This article sums up all the tolerances used in CNC Machining, as well as some tolerancing tips to consider when designing a part.

Tolerances in CNC machining are defined as the acceptable range a parameter can deviate from its intended value. A parameter may be a measurable physical property such as temperature, humidity, noise levels, stress, solar irradiance and speed, or a physical dimension, for example, the definition of space.

It specifies the permissible limits of variation before a value is deemed out of place. In engineering, tolerance can be viewed as the permissible degree of error. Tolerances typically have an upper limit which is the maximum allowable positive deviation, and a lower limit which is the maximum allowable negative deviation.

Tolerances used in CNC machining

The term tolerance is used in two different contexts in regards to CNC machining: in terms of CNC machines and in terms of design for CNC machining.

Tolerance in the context of CNC machines is the degree of dimensional accuracy a machine can achieve when machining a part. CNC machines are highly accurate with some machines being able to produce parts to an accuracy of ± 0.0025mm. That’s the size of a quarter of a human hair. However, the tolerances of different CNC machines vary and are usually specified by the manufacturer, for example, 0.02mm is a typical average tolerance. CNC machining service providers also specify the tolerance of their machines to customers.

In design and manufacturing, tolerance is the acceptable range of variation of the dimensions of a part, that will still allow full functionality of the part. Tolerances are determined by the designer and are based on the function, fit, and form of the part. They are especially crucial for components that mate or interfere with other components. For example, the parts for an electric engine would need to have a higher tolerance compared to a door handle. This is because the former has a lot of features that mate with other components. A tolerance is represented by a numeric call-out written beside the dimension to which it applies.

There are different types of tolerance including limit tolerances, unilateral tolerances, bilateral tolerance, and a system of tolerances known as geometric dimensioning and tolerancing (GD&T).

Limit tolerances

Limit tolerances are two-dimensional values that specify the acceptable range of a dimension. The upper limit specifies the maximum acceptable dimension while the lower limit specifies the minimum acceptable dimension. Any value in between these two is acceptable. 0.55 – 0.65 mm is an example of a limit tolerance, with 0.65 mm as the upper limit and 0.55 as the lower limit.

Limit tolerances for a shaft and a hole in CNC machining
Limit tolerances for a shaft and a hole

Unilateral tolerances

A unilateral tolerance is one in which only one direction of variation from the specified dimension is permitted. The direction may either be positive or negative (addition or subtraction from the specified value). An example of a unilateral tolerance is 1.5 mm +.000/-.005. This means that the dimension may deviate as high as 1.505 mm but cannot go any lower than the original specified value of 1.5mm.

Unilateral tolerances in CNC machining
Unilateral tolerances

Bilateral tolerance

Bilateral tolerances for CNC machining are symmetrical around the base dimension. This means that the upper and lower limits deviate from the base dimension by the same value. As opposed to unilateral tolerances, the deviation in bilateral tolerances occurs in both the positive and negative directions.

Geometric Dimensioning and Tolerancing (GD&T)

GD&T is a superior, more difficult system than standard dimensioning and tolerancing (SD&T) It not only provides the dimension and tolerance of a part but also specifies the exact geometric characteristic of the part the tolerance applies to. While SD&T covers shape, GD&T goes further to also cover geometric characteristics such as flatness, true position, and concentricity.

GD&T System
GD&T System

Tolerances tips for CNC Machining

Tolerancing is the process of adding tolerances to your dimensions when designing a part. The following are important tips to note when tolerancing for CNC machining:

  • Tolerances are very important to your design. However, not all the features of a part need to be toleranced. In order to save machining time and cost,  only apply tolerance to crucial features such as features that mate or interfere with other parts.
  • Avoid unnecessarily tight tolerances. Tight tolerances often cause increased scrap production, special measurement tools, additional fixturing, and longer cycles. These all lead to increased machining costs.
  • Usually, when tolerancing you also need to keep in mind the tolerance capability of the CNC machines that will machine your part. But when you order your parts from Eco Rapid, you don’t have to pay attention to this because we have the one stop-shop manufacturing center, which makes it possible to find a suitable machine for your project that would keep the tolerance you need.
  • Keep peculiarities of the material in mind. The difficulty of machining a part to a particular tolerance is very dependent on the material the part is made from. As a result of the material flexing during machining, soft materials make it harder to hold a specific tolerance.

If you are interested in to know more technology about CNC Machining, feel free to reach out with us at eco@eco-rp.com or 8613712611558

Material For CNC Machining

Consider When Choosing Materials for CNC Machining

This article sums up the major factors to take into account while selecting the right material for a CNC machining project, from the part application to the core characteristics of the material itself.

Computer Numerically Controlled (CNC) machining is a swift, efficient, accurate, and versatile process. This manufacturing method is compatible with a wide range of hard and soft engineering materials, including metals, plastics, semiconductors, elastomers. It is both used in prototyping and for the production of fully functional end-use products. The success of a CNC machining project and the functionality of the produced part depend significantly on the material used. This is why material selection is an essential step in CNC manufacturing that has to be done carefully. 

Several factors and requirements determine the suitable material for a CNC machining project.  For example, do you need a material with excellent mechanical properties? On the other hand, is high production speed the priority? Quite often, a consideration of numerous factors determine the suitability of a material. The following factors are not exhaustive but will establish a firm foundation when selecting materials for CNC machining.

Materials selection process

To succeed in choosing the best possible material for CNC machining, you can follow these basic steps:

  • Step 1 – Determine material requirements. Consider the properties such as functionality, electrical properties, strength and hardness the material should possess to be the most suitable candidate for your project. Also, take into account the operating environment the part will be used in and the conditions it will be exposed to.
  • Step 2 – Identify potential material options. Sort out all the suitable materials according to your requirements, including the specifications of your design.
  • Step 3 – Select the most appropriate material. Choose the material which fulfils the largest number of your requirements. Sometimes a compromise needs to be made, for instance, a material with good machinability over a more low-cost one to ensure the quality of the part.
CNC machining material properties

CNC machining materials selection guidelines

Here are the most important factors to take into account when selecting the right material for CNC machining projects.

Part Application

This is one of the most essential and foremost considerations in selecting material for CNC manufacturing. Different applications require different materials. A part produced for aerospace application has to be lightweight compared to a part for building structural support. For example, aluminium 3.3211 is commonly used in the aerospace industry for its good strength to weight ratio.

The application area will determine the material’s physical properties such as tensile strength, strength to weight ratio, crack resistance, rigidity or flexibility. Generally, heavier materials withstand more stress, but in weight-sensitive applications, then lighter materials with good strength to weight ratios must be selected. Steel 1.0503 and 1.0038 are relatively heavy materials, compared to lighter aluminium alloys such as aluminium 3.3206.

CNC aluminium part
CNC aluminium machined part for the automobile industry

Operating Environment

The environment in which the part will be used is a critical factor in deciding the material. Operating conditions include temperature, harsh chemicals, exposure to UV radiation, continuous contact with water and even subjection to flames. Any material selected must have its melting temperature safely above the operating temperature. If this is not the case, the part might undergo structural variations when exposed to the high operating temperature. 

In addition, the part selected must be able to withstand the heat that comes from the machining operations. Steel 1.4404 has great heat resistance, up to 861°C. It is easy to predict the temperature or moisture conditions a material will be exposed to in indoor usage to a certain degree of accuracy. With this, choosing a material becomes more effortless. 

However, in outdoor applications, it is best to select materials such as stainless steels that can withstand large moisture concentrations and rusting while maintaining their physical appearance and structure. In addition, extreme weather variations are more likely to occur outdoors; this could cause structural warping in certain materials.

Dimensional Stability and Tolerance

Industries like aeronautics and aerospace require components with extremely precise dimensions and excellent stability. Such conditions will require materials with good dimensional stability i.e. low deformation factor. Different materials respond to the forces generated by the cutting tool in different ways. Therefore, the part selected must be able to attain the tight tolerances required. The more machinable a material is, the easier it is to achieve tighter tolerances.

For example, the high machinability of aluminium makes it possible to produce parts with very high tolerances using this material. Note that tighter tolerances are more expensive to produce. So whenever dimensional tolerance is not a vital requirement, it is advisable to use less tight tolerances to reduce the time and expenses involved in machining the part.

Electrical Conductivity

Certain materials, such as copper and silver, are excellent conductors. On the other hand, PTFE is a good insulator. For parts for electrical applications, the choice of material will depend on the electrical properties required of the part. Therefore, it is vital to consider the electrical conductivity of the chosen material. Metals are generally good conductors of electricity, while plastics are typically good insulators.

Machinability

If a part needs to be produced in large quantities or batches, it is more suitable to choose materials with easy machinability to reduce time and expenses. Materials like aluminium, brass are much more machinable than tool steel, even though the latter has more strength. Materials with low machinability should only be chosen if they are to be produced in smaller numbers and product turnover time is flexible enough. Such materials require more resources, time, and effort to machine. 

Note that machinability is a secondary consideration during material selection and should not be considered at the expense of other core considerations such as part application.

Physical Appearance

Aesthetics is not usually among the primary considerations when selecting a material. However, in some cases, it is of high importance. For certain products, the physical appearance will determine the general acceptability of such products by the consumers. Consumer products may require specific physical features such as colour or a smooth surface finish.

Metals typically have a good suface finish after machining, thus requiring less work during polishing. Plastics are usually available in different colours, while metals require post-processing to colour them.

CNC metal part anodized in red

Material Costs

Sometimes, the most suitable material for a part is expensive. The price of acquiring such material stretches far beyond the production budget. It becomes necessary to look at other low-cost materials. However, careful consideration must be given to the functionality, strength, hardness, chemical tolerance, electrical properties, and other properties to determine that such a material is a viable low-cost alternative to the best suitable material. For example, steel 1.4571 has excellent wear and corrosion resistance, as well as good machinability.

However, it is twice as expensive as steel 1.7131 which also has great wear resistance. For applications in which resistance to wear is of the primary concern, steel 1.7131 is a great alternative to steel 1.4571.

Availability

Availability is an important consideration when selecting materials for CNC machining. Sometimes, the most suitable material may not be available in quantities large enough to sustain production. On the other hand, the procurement of such material could be difficult. It is wise to select materials that fit into the functional requirements and are readily available for use, especially if the part will be produced in large numbers. Easily accessible materials ensure that the CNC machining is done in the least possible time and efficiently.

Conclusion

The choice of material influences almost every stage of the product life cycle, from prototyping to full production to the part’s performance in its end application. The key to having a fully optimized finished part begins with selecting the right material. 

Therefore, material selection is a vital part that needs to be diligently considered before beginning CNC machining operations. With the above considerations, it becomes easy to narrow down the list of materials that are best suited for the part and make a well-informed choice of material.

Design Tips For Injection Molding

Design Tips for Injection Moulding

This article sums up the best practices for designing injection moulding to help you get quality polymer parts at a reasonable cost.

The injection moulding process is widely used in large volume production as it produces comparatively low scrap production and has high repeatability. The versatility of the injection moulding process demands much broader design considerations. Most of the design considerations will be made on the mould after setting out the product requirements. 

Some of the factors that affect the injection moulding design include: how the part will be used (singular product or for assembly), its dimensional and mechanical requirements, and its ability to withstand elements such as chemicals or pressure. Some vital tips to consider when designing for injection moulding are explored below.

1. Carefully choose materials suitable for your design

Different injection mouding materials offer varying properties. For example, some injection moulding materials provide more dimensional stability than others. Similarly, some bond better with adhesives than others. Material design considers the following: temperature, pressure, biological and chemical interactions. 

Thermoplastic resins can be broadly classified into amorphous and semi-crystalline.  While semi-crystalline thermoplastics offer better chemical and electrical resistance, their amorphous counterparts are much more dimensionally stable and more resistant to impact. Material selection can affect the required tolerance level or certain features, like wall thickness.

Semi-crystalline resinsAmorphous resins
Advantages• Excellent for bearing, wear and structural applications
• Good chemical and electrical resistance
• Lower coefficient of friction
• Bond well with adhesives
• High dimensional stability
• Good impact resistance
Disadvantages• Difficult to bond with adhesives
• Average impact resistance
• Low resistance to fatigue and stress cracking

2. Take into account the part tolerance

Tolerances are affected by the shrinkage that occurs during the cooling process. Amorphous materials like PLA generally have tighter tolerances than semi-crystaline materials like PEEK. 

Tight tolerances make production more expensive, but they may be necessary for your part to fit or function properly, especially if it is used in an assembly.

We recommend contacting your supplier at the design stage to discuss the tolerance standards that they use.

For example, DIN16901 contains a general tolerance table as a reference for different materials. If your supplier uses this standard and you need tighter tolerances or other standards, they will ask you to provide 2D drawings.

3. Choose the right wall thickness

There are a few key points to consider to ensure you choose the right wall thickness for your injection moulding design:

  • Thinner walls shorten the cycle time and lower the cost of your part. For lots of applications a wall thickness of 1.5-2.5 mm is sufficient, but you can also refer to recommended wall thicknesses for different materials
  • Unlike CNC machined parts, plastic injection moulded parts benefit from a consistent wall thickness. If a part is thicker in one section than another, a sink mark will appear at that location.
  • Non-uniform wall thicknesses also lead to warping, as these walls cool and shrink at different rates. If you require a non-uniform thickness, the change in thickness should not exceed 15% of the nominal wall thickness and should always have a smooth or tapered transition to achieve a high quality part.

The following are the recommended wall thicknesses for different materials:

MaterialRecommended wall thickness
ABS1.143 mm – 3.556 mm
Acetal0.762 mm – 3.048 mm
Acrylic (PMMA)0.635 mm – 12.7 mm
Liquid Crystal Polymer0.762 mm – 3.048 mm
Long-Fiber Reinforced Plastics1.905 mm – 27.94 mm
Nylon0.762 mm – 2.921 mm
PC (Polycarbonate)1.016 mm – 3.81 mm
Polyester0.635 mm – 3.175 mm
Polyethylene (PE)0.762 mm – 5.08 mm
Polyphenylene Sulfide (PSU)0.508 mm – 4.572 mm
Polypropylene (PP)0.889 mm – 3.81 mm
Polystyrene (PS)0.889 mm – 3.81 mm
Polyurethane2.032 mm – 19.05 mm

4. Add draft angles to your design

Many material removal processes such as CNC machining can produce vertical walls. However, creating a part’s design for injection moulding with vertical walls will cause the part to get stuck, particularly at the core, as the part contracts on cooling.

If too much force is applied to eject the part, the risk of damaging the ejector pins and even the mould becomes very high. Design the walls of parts with a slight slant to avoid this problem. This slanting is called a draft. 

Due to the high complexity, it creates in designing, the draft is usually added at the final stages of the part design. Different surfaces require varying drafts. Textured surfaces require the most draft. Some common surfaces found in injection moulding and their minimum draft angles are as follows.

  • For “near-vertical” requirements: 0.5°
  • Most common situations: 1 ~ 2°
  • All shutoff surfaces: 3°
  • Faces with light textures: 1 ~ 3°
  • Faces with medium textures: 5°+

5. Add ribs and gussets to certain parts

Certain parts require ribs. Ribs and gussets give additional strength to parts and help to eliminate cosmetic defects like warping, sink and voids. These features are essential for structural components. Therefore, it is preferable to add them to parts rather than increase the thickness of parts to increase strength. 

However, if not properly designed, this can lead to shrinkage. Shrinkage happens when the cooling rate of certain parts is much faster than others, resulting in the permanent bending of some sections. The warping can be effectively reduced by keeping the rib thickness between 50 – 60% of that of the wall it is attached to.

6. Add radii and fillet to part design

Applying radii to parts, when possible, eliminates sharp corners, which improves the flow of material and the part’s structural integrity. Sharp corners cause weakness in the part as the molten material is made to flow through the corner or into the corner. The only places where sharp corners are unavoidable are the parting surfaces or shut-off surfaces. 

Radii and fillets also aid in a part ejection as rounded corners are less likely to get stuck during ejection than sharp corners. Furthermore, sharp corners are also not structurally advisable as they lead to stress points that can fail. Radii help to smoothen out the stress on the corners. 

Also, including sharp corners in your part will exponentially increase the cost of production as this would require the mould to feature sharp corners that can only be achieved using very expensive manufacturing techniques.

Add internal radii at least 0.5 times the thickness of the adjacent wall and external radii 1.5 times the size.

7. Avoid undercuts and provide slots where possible

Snap fits are obtainable through undercuts. The straight-pull mould, which consists of two halves, and is the most straightforward design, is not suitable to manufacture parts with undercut features. This is due to the difficulty in machining such a mould with CNC and the tendency of the material to get stuck on ejection.

Undercuts are usually created using side cores. However, side cores significantly increase tooling costs. Luckily there are some design tips to achieve the function of an undercut without using side cores. One way of doing this is by introducing a slot instead. 

This is also referred to as a pass-through core. Another way is to adjust or move the parting line of the part. When doing this, also adjust the draft angle accordingly. Moving the parting lines is most suitable for undercuts that are on the outside of the part.

You can also use stripping undercuts, also referred to as bump offs. However, only use this feature when the part is flexible enough to deform and expand during ejection from the mould.

Also, give enough clearance: bump-offs must have a lead angle of 30° to 45° for effective ejection. All these alternatives to expensive side cores require significant redesigning of the part. When the redesign of a part is not possible due to the possibility that it may affect the functionality of the part, then you have to employ sliding side-actions and cores to deal with undercuts.

These features slide in as the mould closes and slide out as it opens. The side cores must move perpendicularly and have appropriate draft angles.

8. Attach bosses to side walls or ribs

Bosses are cylindrical standoffs moulded into a plastic part to accept an insert, self-tapping screw, or pin for assembling or mounting parts.

The outer diameter (OD) of the boss should be 2.5 times the diameter of the screw diameter for self-tapping applications.

Bosses shouldn’t be freestanding. Always attach bosses to a side wall or to the floor with ribs or gussets. Their thickness should not exceed 60% of the overall part thickness to minimize visible sink marks on the outside of the part.

For example, a part with an outer wall of 3 mm should have internal ribs that are no more than 1.7 mm thick.

9. Gating: Highlight visually important surfaces on your part where there must not be any marks

In order to properly design and manufacture your part using injection moulding, it is important for the manufacturer to understand from the outset what your requirements are in terms of its appearance.  

One key point for the tool maker to consider is the gate location. Gates are entry sections through which the molten material enters the mould. The tool maker has to choose the type of the gates and position them strategically to minimize potential quality issues. 

Gates also leave gate vestige or a visual indication that the part was gated—even if it is subtle.

That’s why we recommend letting your supplier know about any aesthetic and functional requirements and defining where not to gate.

Design your parts for injection moulding and source them with Eco Rapid

At Eco Rapid, we offer injection moulding services with over 30 materials, such as plastics, synthetic and silicone rubber, and elastomers. Simply contact us and get a free quote.

EN/FR/DE/IL/RU/ES

Eco - Rapid Prototyping

Eco industrial has been established since 2012, Office located at Dongguan City,Guangdong Province, China.
We have over 10 years of professional experience in supplying precision metal and plastic parts and fittings for Aerospace, Automotive, Robotic, Energy, Medical device, Consumption goods, etc industries.